
Your vacuum spends its days swallowing dirt, dust, and the odd bit of fluff you’d rather not think too hard about. Unsurprisingly, all that gunk takes a toll on its suction and overall performance over time.
Fortunately, a quick clean now and then will keep everything running smoothly, help the machine last longer, and save you from eye-watering repair bills. Curious how to do it properly without turning your living room into a dust storm? Let’s get started.
Round Up the Essentials
No one wants to dismantle half their hoover only to realise their cleaning kit is still buried under the kitchen sink. So, before you roll up your sleeves, you need to grab a few essentials.
First off, grab a lint-free cloth for a gentle wipe-down of the outside. It’ll keep things clean without leaving streaks or scratches.
A touch of mild soap will also help with any stubborn grime, though steer clear of anything too strong, as it can compromise the hoover’s components.
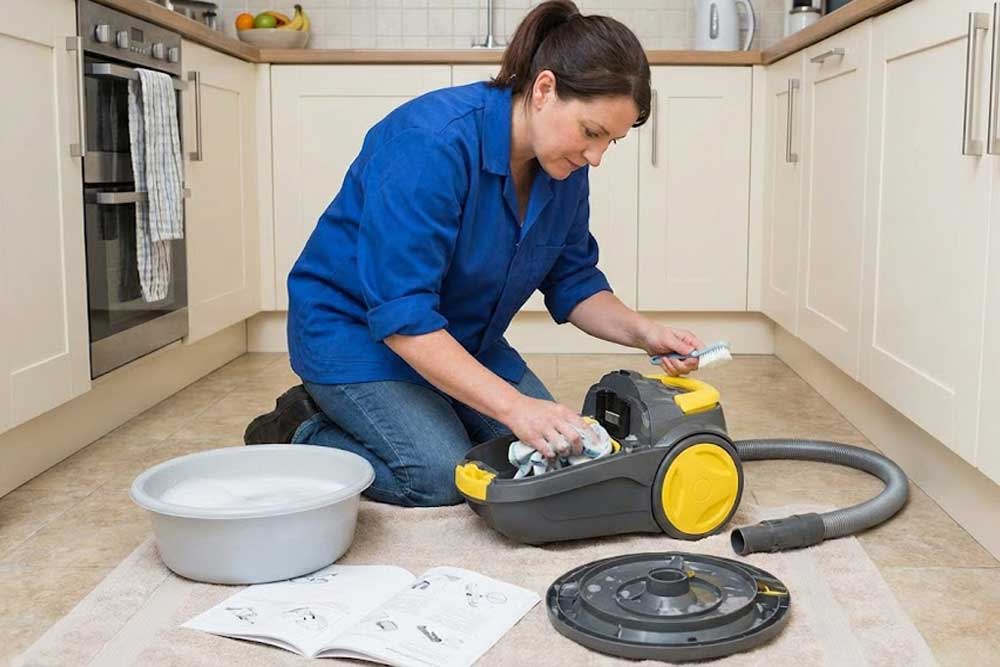
Next up, get a fine-bristle brush. It’s brilliant for reaching the tiny crevices where dust accumulates.
And while you’re gathering your supplies, take a moment to skim through your vacuum’s user manual. It may not be thrilling, but it’s full of model-specific advice that can prevent mistakes and save you from voiding your warranty in a moment of enthusiasm.
Disassemble the Vacuum
Now that you’re fully prepped, let’s ease into the next stage: disassembling your vacuum. It may sound intimidating at first. But if you can build flat-pack furniture or find your TV remote in less than ten minutes, you can absolutely handle this!
Begin by detaching the dust container. Lift it away gently so you don’t accidentally redecorate the room in a fresh layer of grey.
Once that’s sorted, turn your attention to the filters. The removal technique varies by model, so this is a good moment to follow the steps outlined in your manual to avoid any accidental damage.
As you go, place each component on a clean surface or gather the smaller pieces in one container. This will make reassembly quicker and keep you from playing ‘guess the part’ later.
Empty the Dust Container
With everything taken apart, the dust container is the perfect place to start. This little component does a lot of heavy lifting, so cleaning it well will make a noticeable difference.
To do this, tip out the contents and rinse the canister with warm water to flush away the built-up grime.
If anything stubborn remains glued to the sides, a drop of mild detergent and a soft brush will sort it out. In any case, take your time and avoid anything too abrasive.
Once everything is sparkling, let the canister dry completely, since any lingering moisture can cause problems later, from unpleasant smells to damp debris sticking where it shouldn’t.
Wash or Replace the Filters
Since the dust container is now clean and dry, we can move on to the filters—the workhorses stopping dust and allergens from staging a comeback tour through your living room.
To avoid damage, check what your model recommends. It’ll tell you whether your filters are washable or need to be replaced.
If they are washable, a quick rinse under warm water usually does the trick. For filters that look like they’ve survived a sandstorm, though, a spot of mild soap will loosen the grime. Just be gentle; this isn’t a scrubbing-brush situation.
And here’s the big rule: let them dry completely before popping them back in. Damp filters and hoover motors don’t get along.
If your filters look worse for wear or have reached the end of their recommended lifespan, replacing them is the smartest move.
Clean the Brush and Hose
While your filters are drying, preferably away from pets that think anything new is a toy, the next step is to check the brush and hose. These two components often hide the blockages and tangles that quietly impact your vacuum’s performance.
To access the brush, turn the hoover over. You’ll probably spot a tangle of hair, threads, and fluff woven through the bristles. Gently pull these out, and if anything refuses to budge, a quick snip with scissors will set it free.
If your model lets you detach the brush roll, wash it with warm, soapy water and let it dry fully.
Next, move on to the hose. Detach it and peer through to see if anything is blocking the airflow. If there’s a clog, use a wooden dowel or something similar to nudge it out gently.
Go easy, though. If you put in too much force, you could end up with a bigger problem than a blocked hose.
Wipe Down the Exterior
So, you’ve removed the dust, washed the filters, and cleaned the hose and brush. But let’s not forget about the outside of your vacuum, too.
Grab a damp cloth and run it over the casing. It’ll only take seconds, but it’ll instantly make the whole machine look less like it’s been on a construction site.
Don’t forget the vents and crevices as well; dust loves to set up camp in places you’d never think to check.
As you’re cleaning, keep an eye out for anything amiss: a cracked hose, a worn wheel, or any tiny faults that could turn into big headaches if ignored.
Test-Drive Your Vacuum
Everything is clean and dry, so now comes the satisfying bit: putting your hoover back together again.
Reassemble it piece by piece, reversing what you did earlier. Just make sure everything clicks firmly into place, especially the filters and dust container, because even the smallest gap can tank the suction.
Once you’re confident it’s all lined up, plug it in and give it a quick trial run. Listen out for any strange rattles or whistles and adjust the parts as needed.
If all seems well, brilliant. If not, the manual or a professional can help you track down the culprit. Either way, you’ve done the hard part already.
Make Maintenance a Habit
Your vacuum is now sparkling inside and out, but keeping it this way is the real challenge. Luckily, you can keep it performing at its best by making cleaning a regular habit.
So, every few weeks, check in to clear the filters, empty the dust container, and make sure the brushes and hose haven’t collected half the house again.
If you’d rather not deal with the deep-cleaning side of things, a professional cleaner can take that chore off your hands and leave everything fresh and sanitised.
On the other hand, if you notice real problems, like weak suction or odd noises, that’s when you skip straight to a technician. They’re the ones trained to sort out mechanical issues safely.
Conclusion
With your hoover now fully cleaned, you’ve set it up to work the way it was always meant to.
You’ll notice the difference the moment you switch it on, with smoother airflow, stronger suction, and far less complaining from the motor. At this point, don’t be surprised if your floors start giving ‘showroom chic’ every time you walk past.


